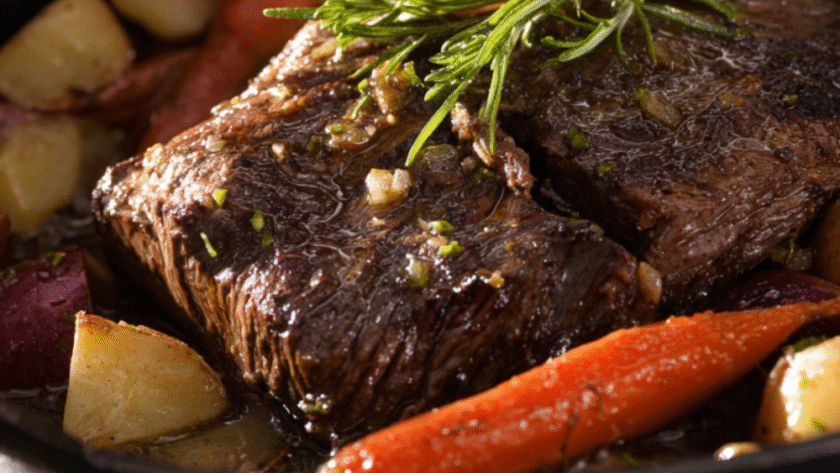
This Pioneer Woman Beef Rump Roast Recipe is a tender and juicy recipe, which is made with garlic and fresh rosemary. It’s a classic, foolproof recipe, ready in about 4 hours.
Jump to RecipePioneer Woman Beef Rump Roast Recipe Ingredients
- 1 Rump Roast (3-4 pounds)
- 3-4 Fresh Rosemary Sprigs, roughly chopped
- 4-5 Cloves of Garlic, roughly chopped
- 1/4 cup Olive Oil
- Coarse Sea Salt and Fresh Cracked Pepper
- 3 Cups of Baby Potatoes
- 3-4 Carrots, sliced into 3-4″ lengths
- 1 White or Yellow Onion, quartered
- 1 cup Beef Stock
- 1 tablespoon Brown Sugar
- 1-2 tablespoons Flour (optional, for gravy)
How To Make Pioneer Woman Beef Rump Roast Recipe
- Prep and Season Roast: Preheat your oven to 275°F. Pat the rump roast dry with paper towels. Season it generously on all sides with coarse sea salt and fresh cracked pepper.
- Sear the Roast: In a large Dutch oven or heavy-bottomed pot, heat the olive oil over medium-high heat. Carefully place the roast in the pot and sear it on all sides until a deep brown crust forms. Remove the roast and set it aside.
- Sauté Vegetables and Deglaze: Add the chopped garlic, rosemary, baby potatoes, carrots, and onion to the same pot. Sauté for 5-7 minutes until they start to soften and get a bit of color. Pour in the beef stock to deglaze the pot, scraping up any browned bits from the bottom. Stir in the brown sugar.
- Roast in Oven: Place the seared roast back into the pot, on top of the vegetables. Cover the pot with a tight-fitting lid and transfer it to the preheated oven. Bake for approximately 20 minutes per pound, or until the roast is tender.
- Rest the Roast: Carefully remove the roast from the pot and transfer it to a cutting board. Tent it loosely with aluminum foil and let it rest for at least 15-20 minutes before slicing. This is crucial for a juicy result.
- Make the Gravy (Optional): While the roast is resting, you can make a gravy. Place the Dutch oven with the vegetables and pan juices on the stovetop over medium heat. Whisk in the flour and let it simmer for a few minutes until the gravy thickens.

Recipe Tips
- Why is searing the roast so important? Searing the meat over high heat creates a flavorful, caramelized crust through the Maillard reaction. This step doesn’t “seal in juices,” but it builds a massive amount of deep, savory flavor that will permeate the entire dish.
- How do I know when the roast is done? For a tender, sliceable roast, aim for an internal temperature of around 135-140°F for medium-rare. For a more fall-apart, shreddable roast, you’ll need to cook it longer, until the internal temperature is closer to 190-200°F. A meat thermometer is the best tool for accuracy.
- Why is it crucial to let the roast rest? When the roast is cooking, the juices are forced toward the center. Letting it rest allows those juices to redistribute throughout the meat. If you slice it too early, all that flavorful juice will run out onto your cutting board, leaving you with dry meat.
- Can I use other vegetables? Yes, this recipe is very flexible. You could also add parsnips, celery, or mushrooms along with the other vegetables.
What To Serve With Beef Rump Roast
This classic roast dinner is fantastic with traditional accompaniments:
- Yorkshire pudding or popovers
- Creamy horseradish sauce
- Steamed green beans or roasted asparagus
- A simple side salad
How To Store Beef Rump Roast
Refrigerate: Store leftover sliced roast and vegetables in an airtight container in the refrigerator for up to 4 days. Freeze: You can freeze the cooked roast, either sliced or whole, for up to 3 months. It’s best to freeze it with some of the gravy or pan juices to keep it moist.
Beef Rump Roast Nutrition Facts
- Calories: 308.3 kcal
- Protein: 30g
- Fat: 15g
- Carbohydrates: 12g
- Sodium: 400mg
Nutrition information is estimated and may vary based on ingredients and cooking methods used.
FAQs
What’s the difference between a rump roast and a chuck roast?
Can I cook this in a slow cooker?
My gravy is lumpy, how can I fix it?

Pioneer Woman Beef Rump Roast Recipe
Course: DinnerCuisine: AmericanDifficulty: Easy6
servings15
minutes3
hours308.3
kcalA tender and juicy beef rump roast, slow-cooked with garlic, rosemary, and hearty vegetables for a comforting one-pot dinner.
Ingredients
-
1 Rump Roast (3-4 pounds)
-
3-4 Fresh Rosemary Sprigs, chopped
-
4-5 Cloves of Garlic, chopped
-
1/4 cup Olive Oil
-
Coarse Sea Salt and Fresh Cracked Pepper
-
3 Cups Baby Potatoes
-
3-4 Carrots, sliced
-
1 Onion, quartered
-
1 cup Beef Stock
-
1 tablespoon Brown Sugar
-
1-2 tbsp Flour (optional)
Directions
- Preheat oven to 275°F. Season roast with salt and pepper.
- Sear the roast in olive oil in a Dutch oven until browned on all sides. Remove roast.
- Sauté garlic, rosemary, potatoes, carrots, and onion in the same pot.
- Deglaze with beef stock, scraping up browned bits. Stir in brown sugar.
- Place roast back in the pot, cover, and bake for 20 minutes per pound.
- Remove roast and let it rest for 15-20 minutes before slicing.
- (Optional) Make gravy by whisking flour into the pan juices on the stovetop until thickened.
Notes
- Sear for Flavor: Searing the roast before baking is the key to developing a rich, deep flavor.
- Rest is Required: Do not skip the resting period. It’s essential for a juicy, tender roast.
- Low and Slow: The low oven temperature ensures the connective tissues break down gently, resulting in tender meat.
- Make-Ahead: Leftovers store beautifully and can be used for sandwiches, salads, or a quick hash.